How to configure Citrix Unidesk File Share
Unidesk File Share is utilized for some of the appliance activities but also for layers.
How to configure the Unidesk File Share
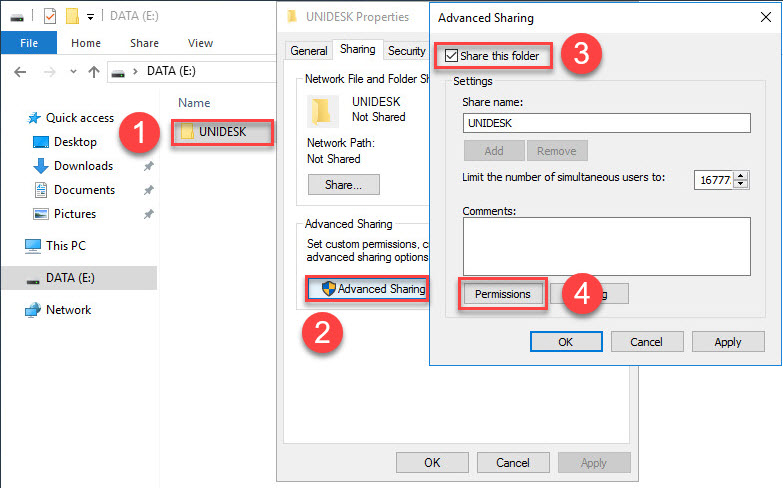
1. Firstly, we will need to create a directory that we will share. Create a share, right-click the directory, select Properties, click the Advanced Sharing button. Check the option to Share this folder and then click on Permissions.
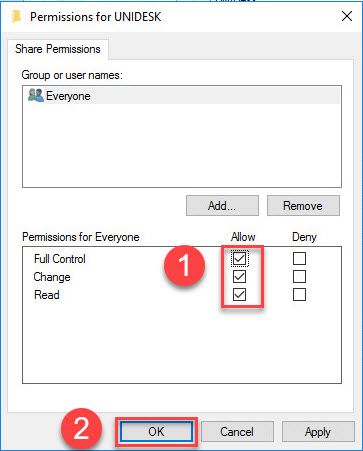
2. Give Everyone Full Control and click OK. Click OK again to close the Advanced Sharing dialog.
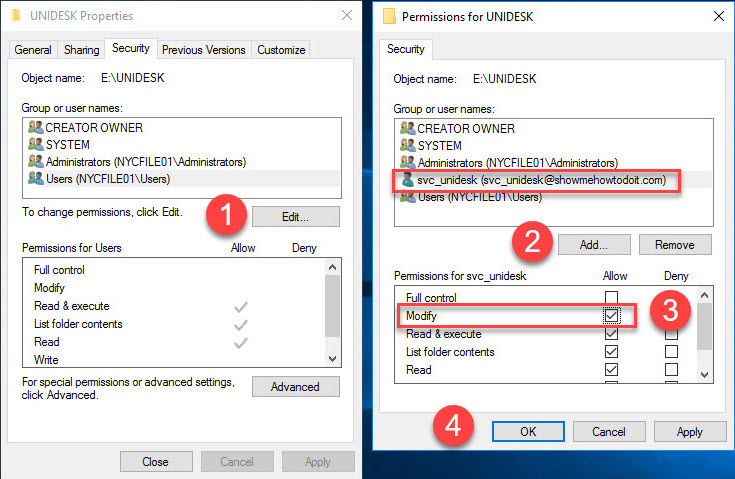
3. Click on the Security tab, click Edit, Add and browse and locate the service account we configured for Unidesk Active Directory authentication. You may opt to utilize a separate account for the file share. Grant the service account Modify permissions since we want to allow only this account (beyond administrators) to modify content in this share. Click OK.
5. Log in to the Unidesk appliance and navigate to System and then to Settings and Configuration. Scroll down and locate the Network File Shares area. Click on Edit.
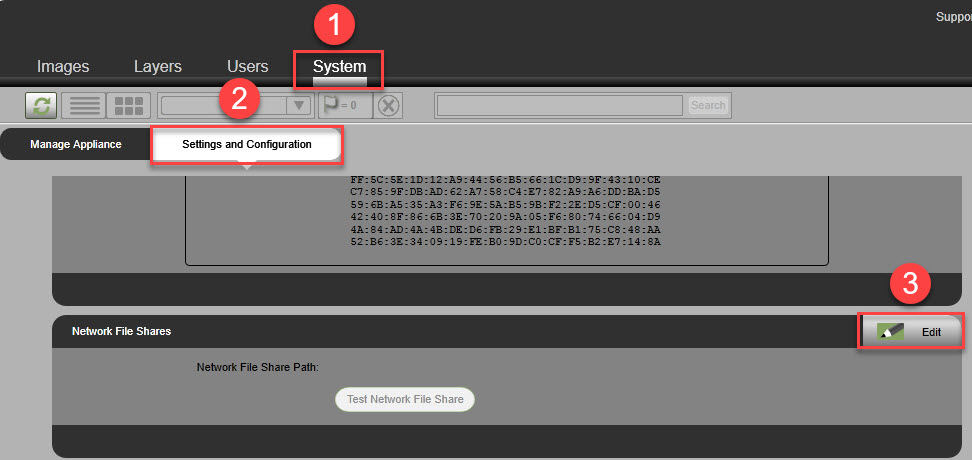
6. Enter the Network File Share Path, user name and Password. Click Test Network File Share. Once successful, click Save.